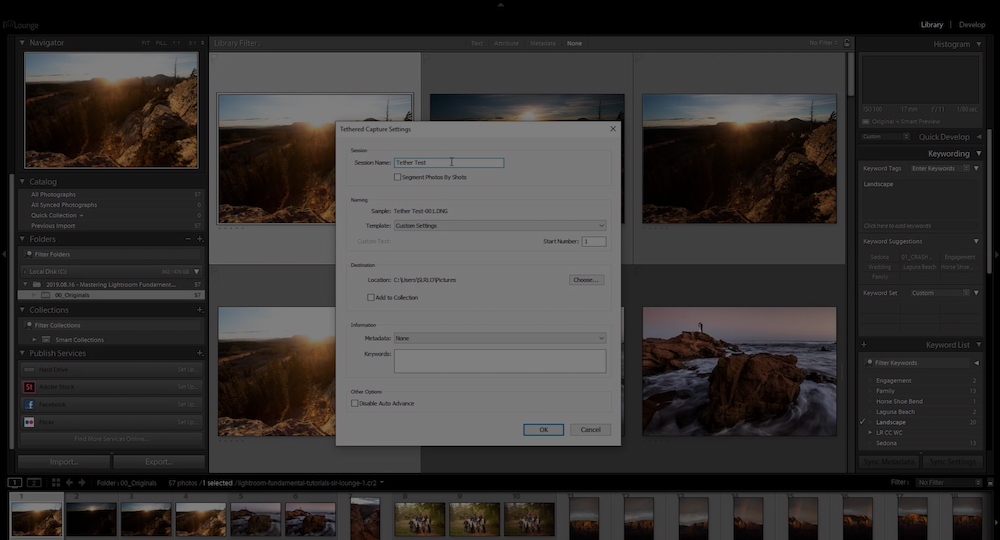
Using tethered capture to import images into Lightroom can prove advantageous in diverse ways, as it allows you to review your images on a larger screen (vs. the 3″ or so LCD screen on the back of your camera), instantly import your photos into Lightroom using predetermined settings, and feel a little bit safer knowing that you’re images will also be stored on your computer (or whichever device you decide to store them on while setting up your tether).
This tutorial is part of our Lightroom Tips Series, where we give you simple guidance on how to use Lightroom more efficiently and effectively.
Step 1. Make Sure Your Camera Is Supported for Tethered Capture
How do you know if your camera is actually supported for tethered capture in Lightroom? Excellent question. You can find the “Tethered camera support” list on Adobe’s website, here.
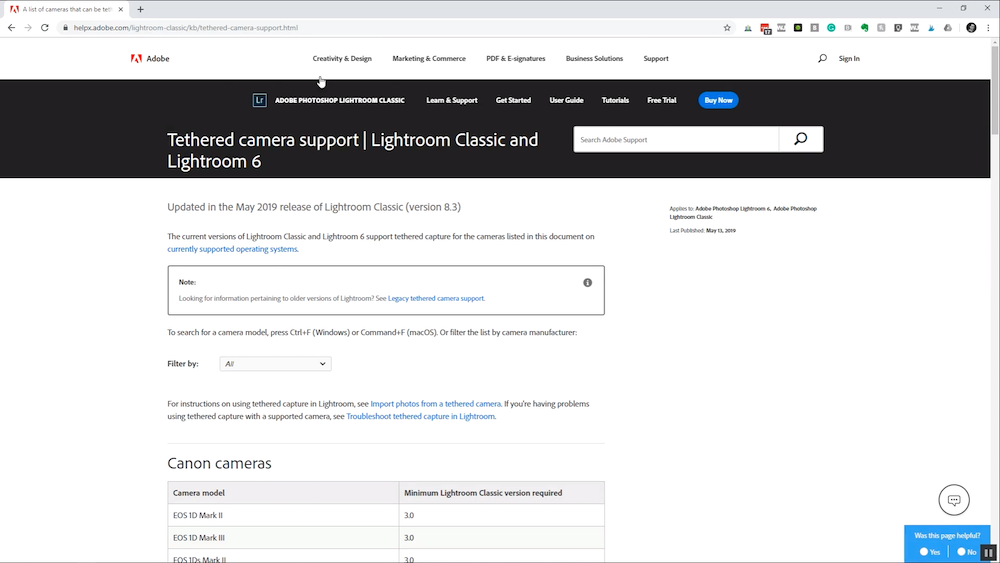
There’s a large list of supported cameras to scroll through on the site. If your camera is NOT listed on this list of cameras, then it cannot import directly to Lightroom by way of tethering. So long as the camera IS listed, then you’re good to go.
Step 2. Buy Your Tethering Gear
You’ll need the following item(s) to connect your supported camera to your computer or other compatible editing device with Lightroom installed. Don’t waste your time buying cheap tethered capture cables. Tether Tools products are affordable, durable and are designed for reliability. The JerkStopper is also a must here since it will prevent trips or incidents where you might pull the cable out of the camera mid-shoot. Either way, you aren’t saving enough money here to warrant the headache of cheaper products.
- Tether Tools TetherPro 15ft USB 3.0 Male to Micro Cable, Hi-Visibility Orange
- Tether Tools JerkStopper (Optional)
- Other Tether Tools Cables
Note: Be sure to confirm whether or not your camera connections are compatible with the tether cable before purchasing, regardless of the brand you choose to go with.
Open Up Lightroom & Get Started
As you’ll see in the steps below, it’s easy to tether your camera to Lightroom.
Step 3: Select File > Start Tethered Capture
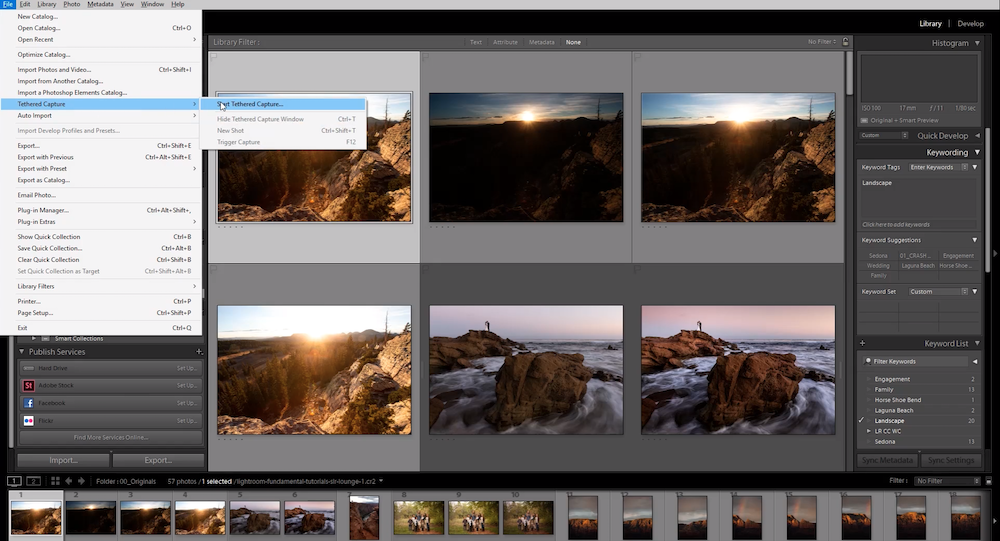
Just as you’d do when preparing to import images, you’ll need to click on the file tab to open the dropdown menu; this time, however, select “Tethered Capture” and then click on “Start Tethered Capture” (see the image above). If your camera is supported, Lightroom should automatically detect the camera and bring up the Tethered Capture dialogue after you’ve clicked on “Start Tethered Capture.”
Step 4: Fill in the Details
The Tethered Capture dialogue box is easy to fill out and requires little to no time when you know which information you need to include.
Give the Session a Name
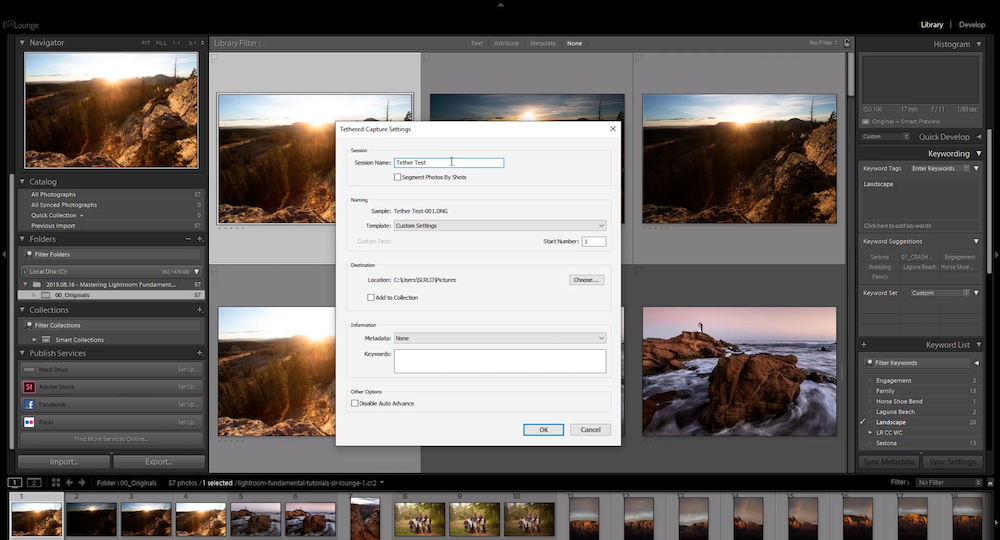
After clicking on “Start Tethered Capture,” you’ll need to give your session a name. In the example image above, you can see where we added the name “Tether Test.”

Lightroom will name the images based on the session name. If you don’t want to rename the images based on the session name, you can change the default template by selecting “Custom Settings” (see the image above).
Choose a Location to Save Your Images

You’re going to want to find your images when you need them, so be sure to choose the location for where your images should be saved. You can choose the location under the “Destination” section of the Tethered Capture Settings dialogue box.
Apply Metadata for Import (Optional)
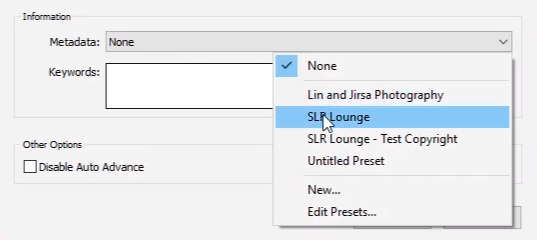
If you have metadata that you’d like applied while importing the images (such as copyright information, etc.), you can choose to do this in the “Information” section of the dialogue box (see the image above).
Step 5: Click OK and Start Capturing Images
When you’re done selecting your options in the dialogue box, click “OK.” All that’s left to do is start capturing images!
Premium Video Tutorials
You can find our full workshop on Mastering Lightroom here.
