
06. How Do I Install Lightroom Presets?
How To Install Presets In Lightroom Classic
With Adobe Lightroom, installing presets correctly used to be very complicated. Now, it has gotten a little bit easier, thankfully! To clear up the confusion, we’ve created this complete, 2020 up-to-date guide for installing presets in Lightroom Classic and Lightroom CC (Creative Cloud).
First, let’s remember that there are currently two different versions of Lightroom: “Classic” and “Creative Cloud” (or CC). Technically, both versions of Lightroom are included in a Creative Cloud subscription. Thankfully, both versions of Lightroom can use presets!
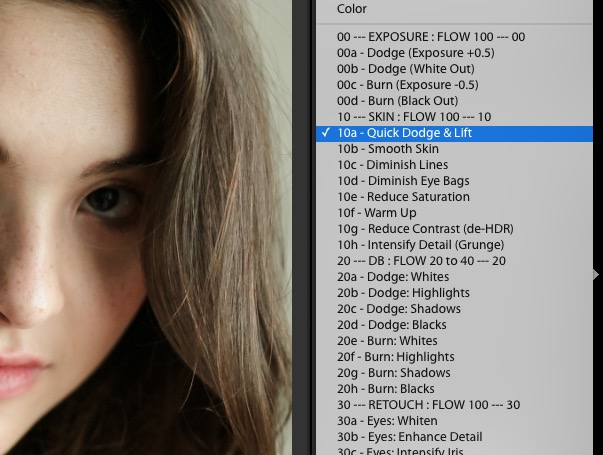
However, there are also two kinds of presets: global presets, which affect your entire image, and brush presets or Local Adjustment presets, which are designed to be used as brushes for things like burning & dodging or retouching.
Unfortunately, this second type of preset, brushes, can only be used in Lightroom Classic. The newer cloud-based version of Lightroom, Creative Cloud, does not (yet) have an option for Local Adjustment Presets. (If that changes in the future, we’ll update this article!)
A Lightroom Preset Installer?
First and foremost, if you purchased presets from somewhere (such as Visual Flow’s preset packs, created by DVLOP), then you may not have to worry about the confusing task of finding the right folders and copying your presets at all! The presets come with an installer that automatically puts the presets in the right place. You can find up-to-date instructions for how to install Visual Flow Presets here for Lightroom Classic and ACR and here for Lightroom (Non-Classic) Desktop and Mobile.
These installers should be able to install presets correctly for both Lightroom Classic and Lightroom CC. Although, again, remember that Lightroom CC does not yet allow local/brush presets.
How To Import Presets Into Lightroom Classic
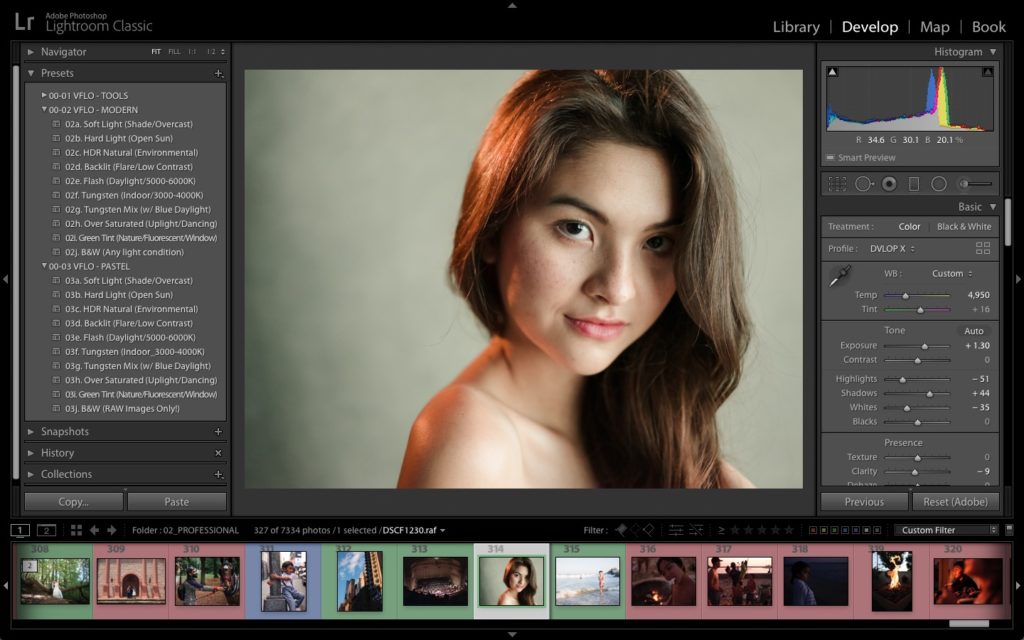
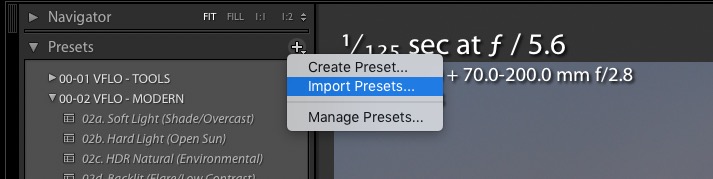
The second-easiest option to try is to import Lightroom presets from within Lightroom itself. In the Develop Module of LR Classic, on the left-hand panel, look at the top of the Presets tab for the “+” icon. Click that, and you’ll see an “Import Presets…” option. Click this, then find your folder of presets, and you should be good to go!
NOTE: Sometimes, presets that are supposed to be organized inside a folder may appear in your default “User Presets” folder instead. You can drag presets from one folder to another within Lightroom; however, at present, you cannot create a new preset folder unless you actually go into the “Create Preset” dialog.
Within this dialog, you can create a random preset with any settings, and in the drop-down option for Group, click “New Group…”. Name the group/folder whatever you want, create the new preset, and then drag-and-drop the other presets that you want to be in that folder. (When you’re done, you can delete the unnecessary preset you first created, and the folder will remain.)
WARNING: You may be wondering, “Can I rename and/or move presets and folders outside Lightroom, in Windows Explorer, or Apple Finder?”
Technically, yes; however, there is a strong possibility that Lightroom itself will not recognize these changes because name and folder information is also written into the code of the preset itself. For this reason, we always recommend moving and renaming presets within Lightroom!
How To Install Lightroom Presets Manually
Just in case you aren’t successful when using the “Import Presets” option inside Lightroom, here are the steps to install presets 100% manually…
NOTE: You will also need to use this method if you want to install Brush presets, AKA Local Adjustment presets, in Lightroom Classic.
Basically, you need to find the actual folders where all these presets are stored. So, where DO you put Lightroom presets?
If you’re using one of the latest versions of Lightroom Classic, then Local Adjustment/Brush presets are stored in a completely different folder from “global” (regular) presets.
They are different types of files, too. Local Adjustments in Lightroom are stored as the traditional .LRTEMPLATE files, while Global presets are stored as standard .XMP files.
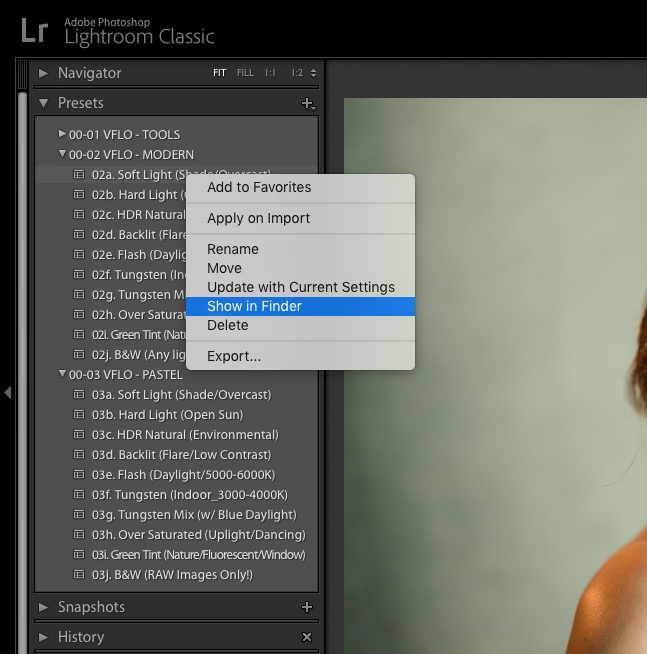
Finding the folder where global presets are stored is easy in most versions of Lightroom: simply right-click on one of your presets, and click “Show in Finder/Explorer.” Once you’ve opened the folder, you can copy presets into it, and upon restarting Lightroom you’ll see those presets.
There is no import or right-click option to help find your Local Adjustment presets in Lightroom, and they’re in a completely different folder, too. In fact, this folder is invisible by default on both Windows and Mac OS.
So, here is how to find each of the folders for both types of presets, (Global and Local) on both a PC and a Mac:
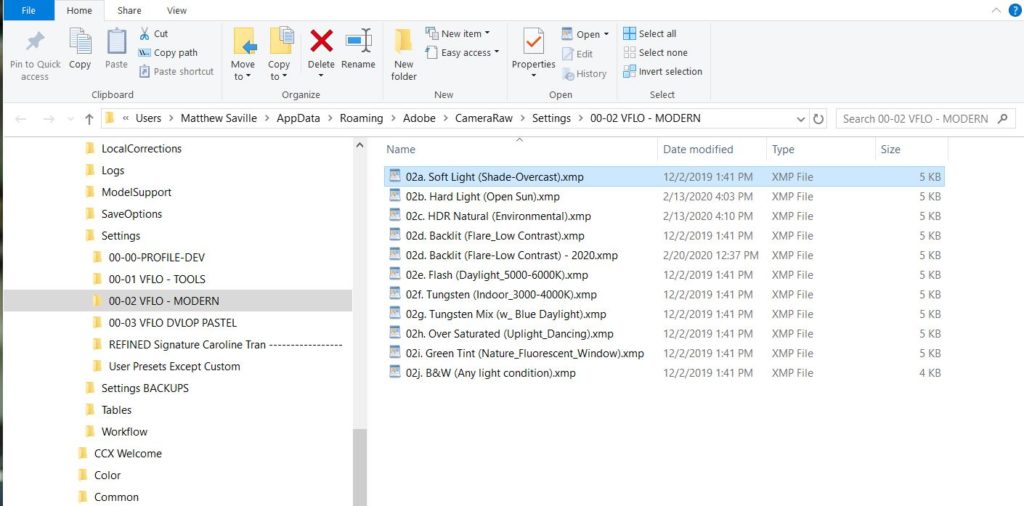
On a PC, the folder for Lightroom’s Global Presets is here:
Users > (YOUR USERNAME) > AppData > Roaming > Adobe > CameraRaw > Settings
On a PC, the folder for Lightroom’s Local Adjustment Presets is here:
Users > (YOUR USERNAME) > AppData > Roaming > Adobe > Lightroom > Local Adjustment Presets
NOTE: The underlined folder, “AppData,” is the one that is invisible by default in Windows Explorer. To reveal this hidden folder, look in the “View” menu tab of Windows Explorer, and check the box for “Hidden items.”
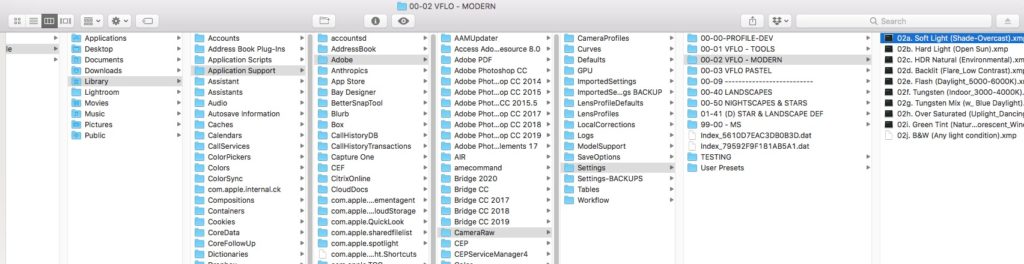
On a Mac, the folder for Lightroom’s Global presets is here:
Users > (YOUR USERNAME) > Library > Application Support > Adobe > CameraRaw > Settings
On a Mac, the folder for Lightroom’s Local Adjustment Presets is here:
Users > (YOUR USERNAME) > Library > Application Support > Adobe > Lightroom > Local Adjustment Presets
NOTE: The underlined folder, “Library,” is the one that is usually invisible in Apple Finder. To reveal this hidden folder, you can use the hotkey combo “CMD + Shift + (period).” You can also try and back-track to this folder by using the right-click, ‘Show in Finder” trick for global presets, because the Library folder is one of the parent folders for both types of presets.
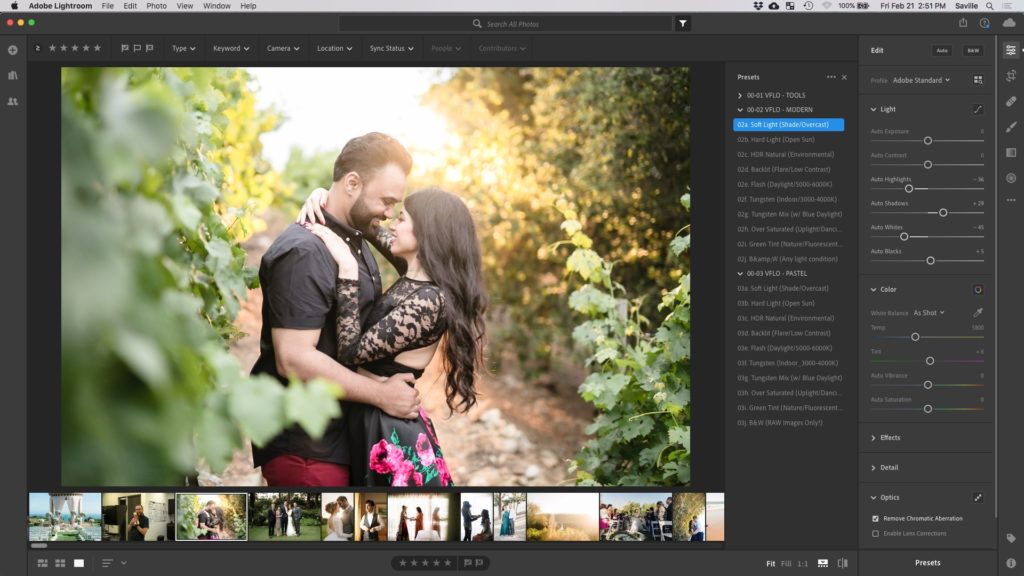
How To Install Presets In Lightroom CC
With Creative Cloud, presets are managed a bit more universally, thankfully, because the whole goal of Creative Cloud is to store everything—from your images themselves to your Lightroom catalog, settings, and presets—on the cloud.
To install Presets in Lightroom CC (Creative Cloud), simply look for the “Presets” tab at the bottom of the main “Edit” tab, and then click on the “…” icon to bring up the options for “Create Preset,” “Manage Presets,” “Import Presets…” and “Hide Partially Compatible Presets.”
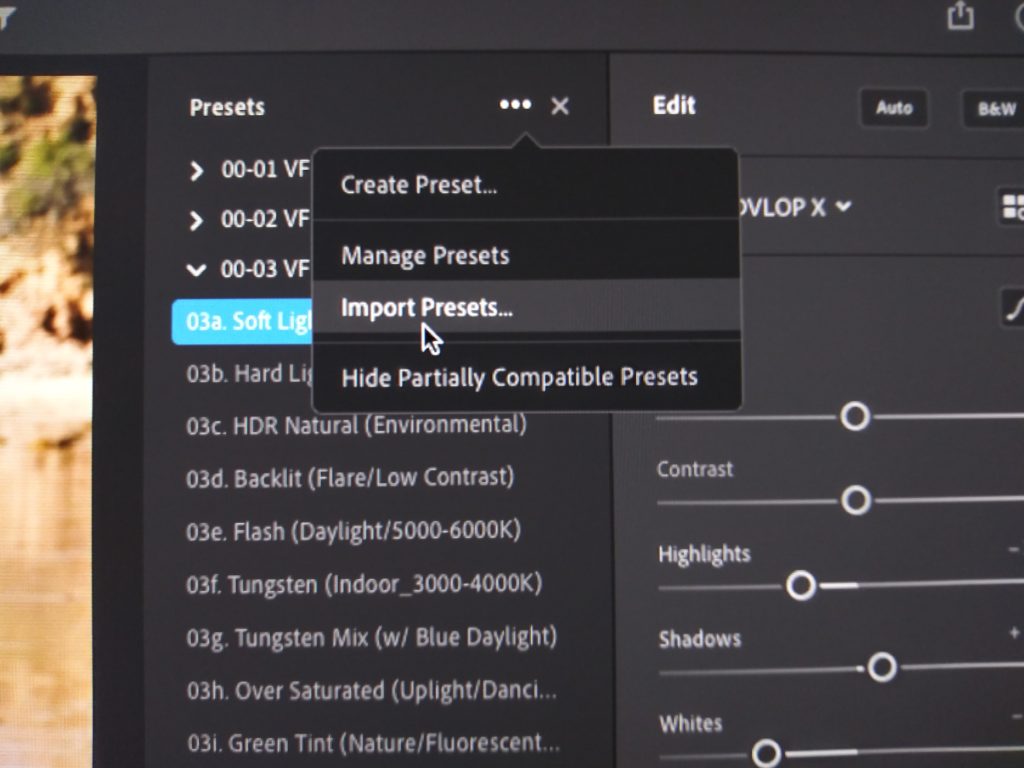
Next, use the “Import Presets…” option to find your folder of presets, and you’re good to go! (You don’t need to find each preset file one at a time, you can import entire folders of presets at once!)
Again, if Local Adjustment (Brush) presets become available in Creative Cloud, we’ll update this article!
Should you need to manually install presets for Creative Cloud, though unlikely, you should be able to use the previously described method as well. Again, just be careful moving or renaming presets manually, because Creative Cloud is designed to be a synchronized, cloud-based application.
How To Install Presets In Old Versions Of Lightroom
What if you have an older version (pre-CC 7.3) of Lightroom; can you still install presets? Yes, however, the compatibility becomes an issue because the Adobe Lightroom Classic 7.3 update made a significant change to the Adobe Camera Raw engine that Lightroom’s Develop Module is built on. So, if you have presets that are specifically made for the latest version of Lightroom, they may not be fully functional in older versions of Lightroom.
There is one additional detail about how presets were handled before the 7.3 update of April 2018: Global presets, that is, were previously stored in a different folder, and in the file format .LRTEMPLATE. (Not .XMP, as with newer versions of Lightroom.) Here is where you can find that folder:
PC:
Users > (YOUR USERNAME) > AppData > Roaming > Adobe > Lightroom > Develop Presets
Mac:
Users > (YOUR USERNAME) > Library > Application Support > Adobe > Lightroom > Develop Presets
Once again, note that the underlined folders are invisible by default, so you’ll have to follow the previously mentioned steps to find this folder. However, in most older versions of Lightroom, you should still be able to right-click a (global) preset and click “Show in…”, too.
Learn More About Lightroom
There you have it! Hopefully, this tutorial has helped you get all of your presets into Lightroom. (Don’t forget to back up your presets from time to time, too!) If you’d like to learn how create other types of presets, here are some other tutorials:
RELATED: How to create an Import Metadata preset in Lightroom Classic CC (2020 Update)
To learn more about Lightroom, be sure to read through our other tutorials on the Visual Flow Blog and check out our full Mastering Lightroom workshop.