The Lightroom Panorama Introduction
Creating panoramic images within Lightroom is quick and easy using the Panorama Photomerge option from the Develop Module. In this Lightroom tutorial, we will outline exactly how to create panoramic images while giving you tips along the way.
This tutorial is part of our Lightroom Tips Series, where we give you simple guidance on how to use Lightroom more efficiently and effectively.
Step by Step Guide for Lightroom Panoramas
Step 1 – Select the Images You Wish to Merge
Identify and select the photos you wish to use for the panorama. Click on the first image in the series and then hold the “Shift” key while clicking on the last image in the group as shown below.

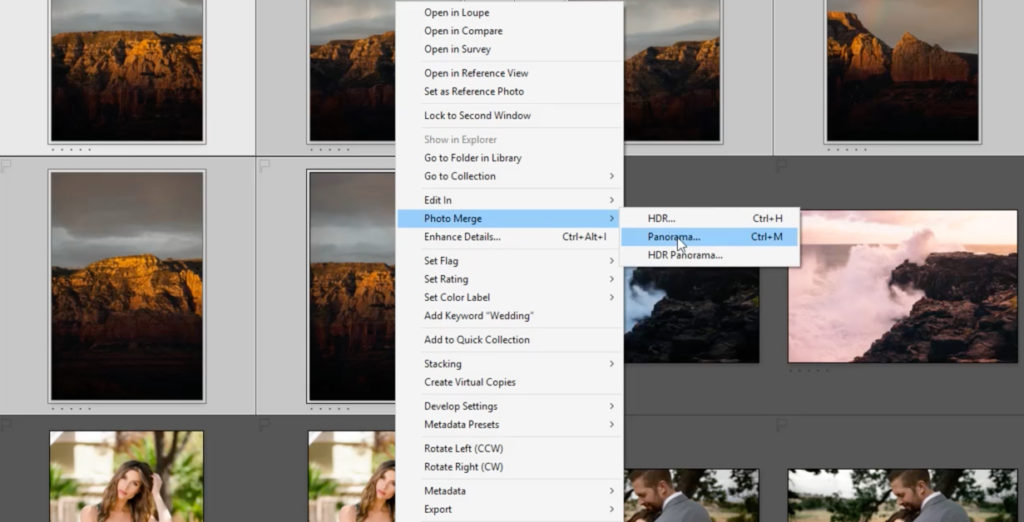
Step 2 – Right Click > Photo Merge > Panorama
Right-click over one of the selected images, select Photo Merge > Panorama to load Lightroom’s Panorama Tool. You can also use the shortcut Ctrl+M.

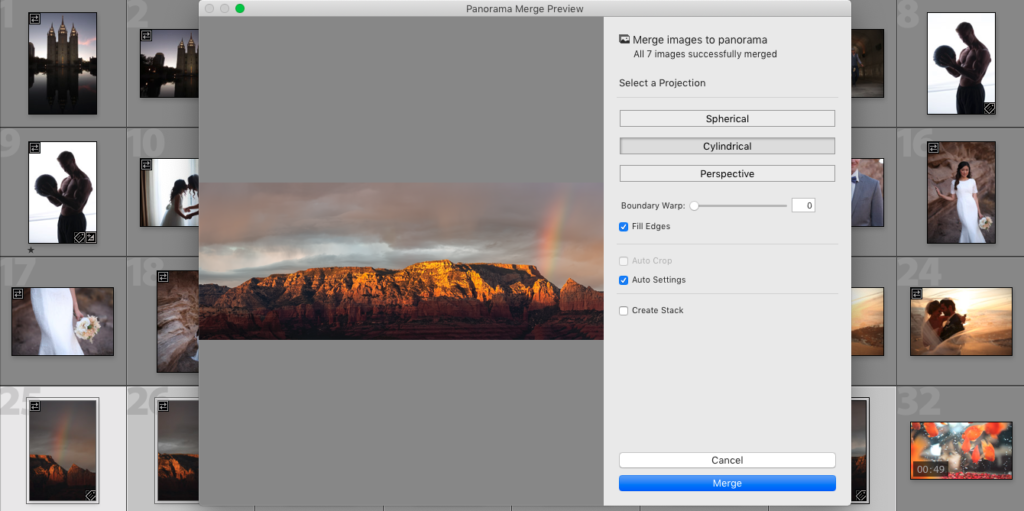
Step 3 – Choose Your Settings
The Merge Preview window contains the following settings. Here’s what we would recommend for each as starting points.
- Projection – Begin with Spherical. Select Cylindrical or Perspective if there’s too much distortion/warping in the image. NOTE: Sometimes the image will fail to merge with specific Projection-types. If this is the case, select a different Projection.
- Boundary Warp – Bends/warps the edges of the image, adjust as desired.
- Fill Edges/Auto Crop – Fill Edges will attempt to fill empty space at the edges of the frame, where Auto Crop will automatically crop away the empty space. Select either.
- Auto Settings – Auto settings will attempt to process the image. We’d recommend you leave this unchecked and process it after the image is merged.
- Create Stack – Stacks the merged image with other images in the selection. Leave unchecked unless you prefer stacking as a method of organization.

Step 4 – Finalize Your Post Production to Taste
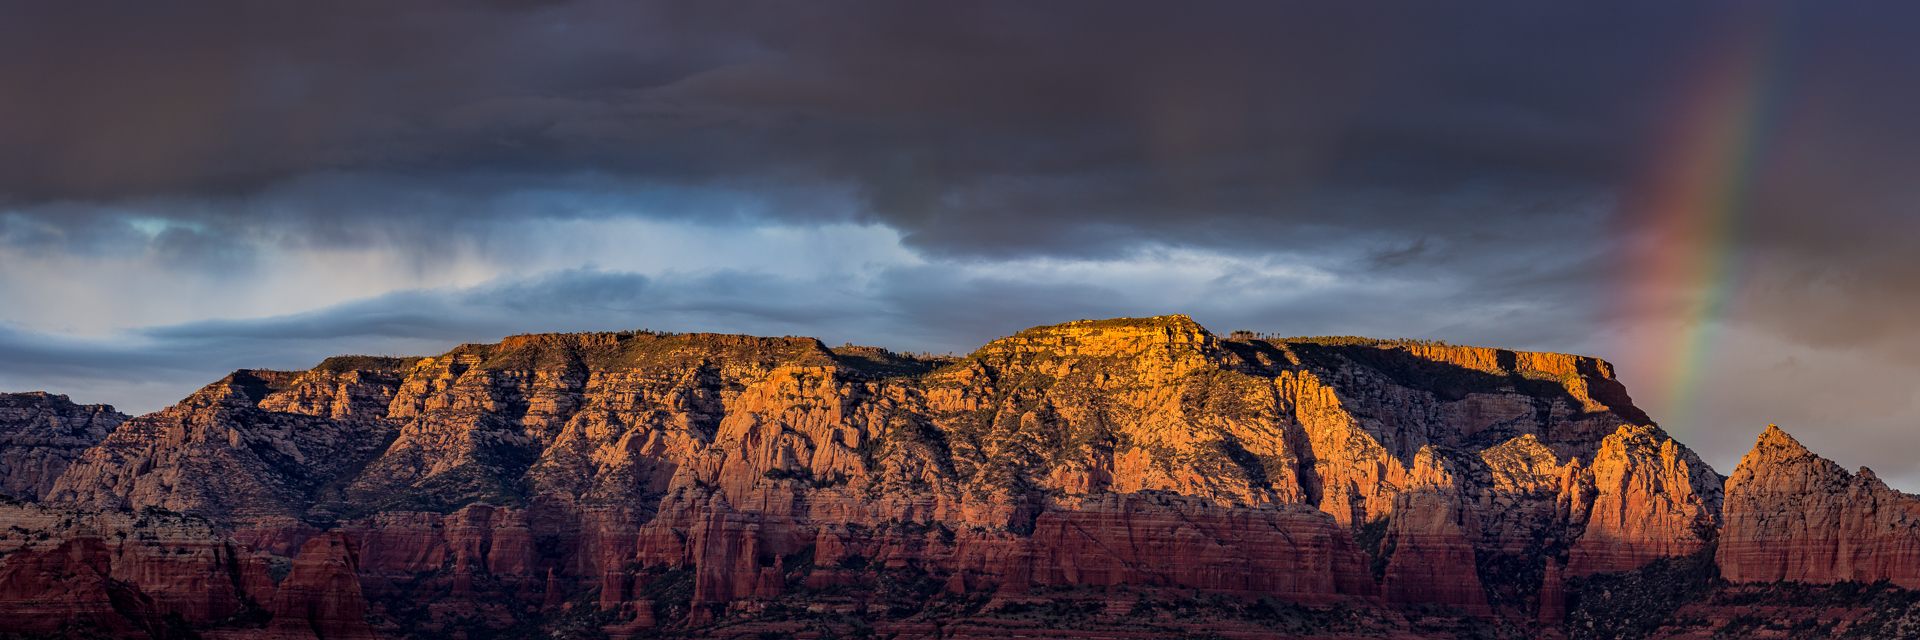
Once merged, experiment with your Retouching Tools in Lightroom and edit your image to taste. Consider the Visual Flow Presets.
Tips When Shooting Panoramas
Tip 1 – Lock or switch your focus to manual: This will help avoid accidentally resetting the focus point during capture, which would likely result in Lightroom being unable to merge your photos.
Tip 2 – Provide overlap and leave extra room in the frame: Overlap each individual image by around 1/3rd of the frame. In addition, give yourself extra space in each frame since merging panoramas often tends to crop a lot of the corners and sides of the image. Shoot additional frames and leave room for yourself to crop in post.
Tip 3 – Merge raw, process AFTER: Lightroom merges your camera’s raw files to raw DNG files. This means you still have all the information in the final merged image. Rather than processing before the merge, save time and just process the final panorama.
Free Video Tutorials
See this video tutorial by Trevor Dayley on our sister site, SLR Lounge. Read the full article here.
Premium Video Tutorials

Find our full workshop on Panoramic Stitching here.
Tags: stitching photos in lightroom, lightroom stitch panorama, hdr panorama lightroom, merge photos lightroom, lightroom panorama merge.

Leave a Reply
You must be logged in to post a comment.